
DIY Accent Ceiling for Beginners
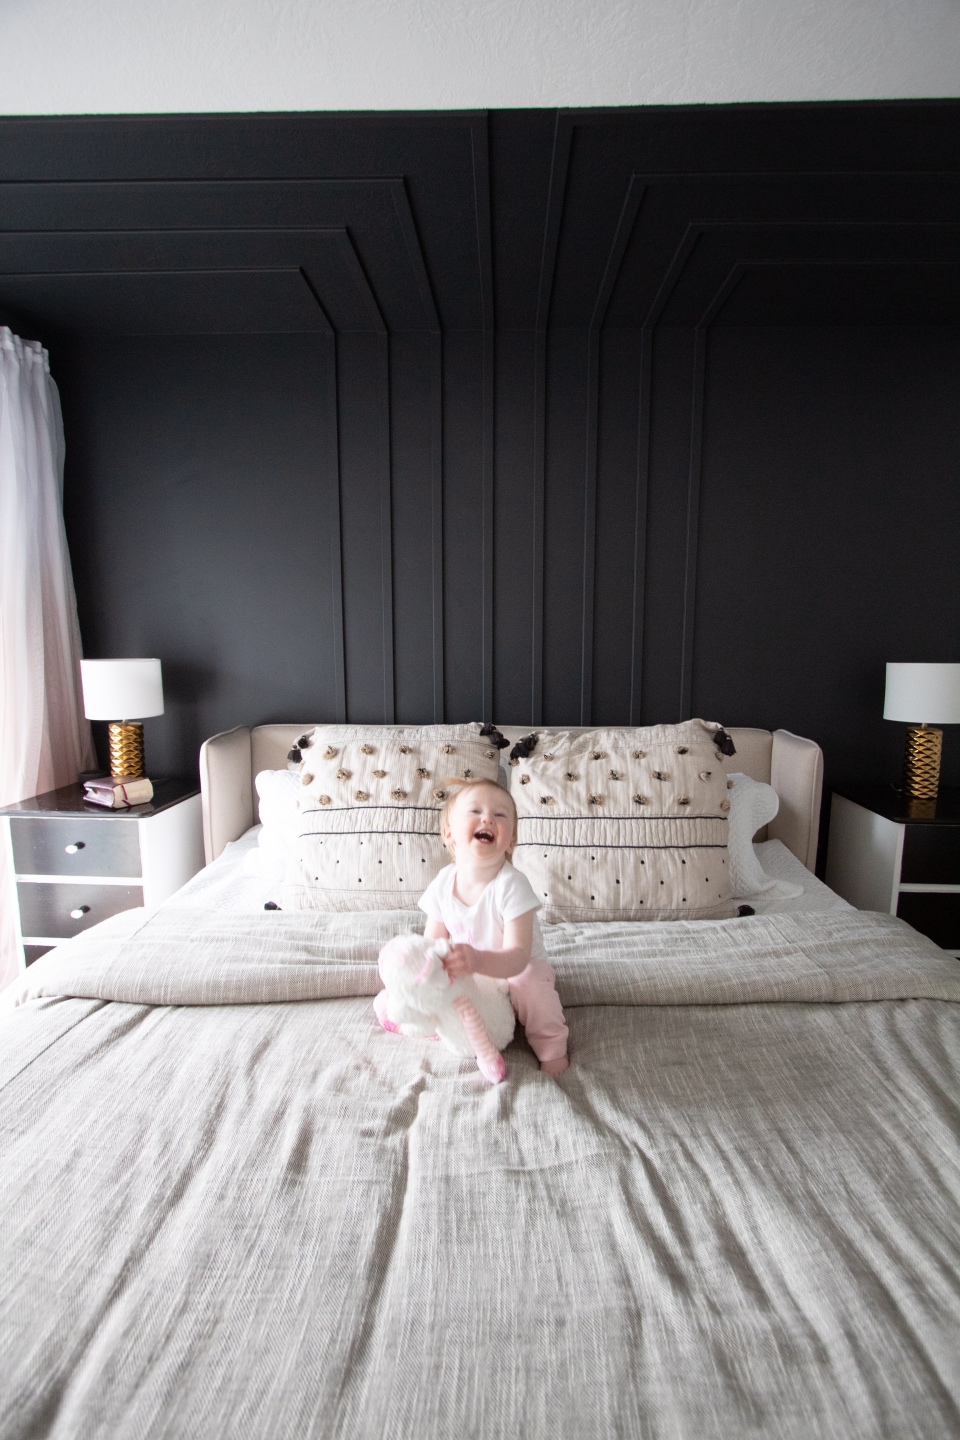
This Accent Wall to Ceiling is my favorite accent piece in our home. This wall to ceiling accent wall has really added a decorative flair to our master bedroom space that I absolutely love. If you’re looking for a showstopper accent wall, something sexy, something dark, something noir, something YOU for your master bedroom, then this DIY Accent Ceiling for Beginners is the perfect route to go.
You are the reason for this blog post and it is written to help YOU build this accent wall. Therefore if this was my first accent wall, and if I could build this, then I know for a fact you can build it too.
Feel free to checkout the YouTube Video at the bottom of this post to show you the material, tools and steps I used to create my daughters accent wall. This visual will be a great benefit to you.

You Can Build Your Dreams
First, I have also linked all products in my master bedroom that you can purchase here to help you build this fabulous noir accent ceiling bedroom wall.
As a Beginner in DIY, I HIGHLY recommend that an accent wall be your first project!! The easiest accent wall I did was for my daughters bedroom nursery, and I also added wallpaper to that one if you want a different idea for an accent wall. Let this blog post be your guide and help you become confident in building the accent ceiling or accent wall of your dreams.
Instagram Resource
Likewise, You can also head to my Instagram [@ourfamilymaison] and watch my highlight bubble ‘Accent Wall’ that will give you a step by step of what is needed to build an accent wall. A wealth of DIY accent wall information will be there to aid you in your DIY journey to starting your own accent wall project.
Even though my accent wall also wrapped up into the ceiling, but I’ll give you the step by step guide of just the wall. If you’re feeling creative, feel free to add more on the ceiling too. 😉
Back to the Accent Ceiling Bedroom, let’s talk Supplies.
There are affiliated links associated with this blog post at no extra cost to you.
Supplies Needed:
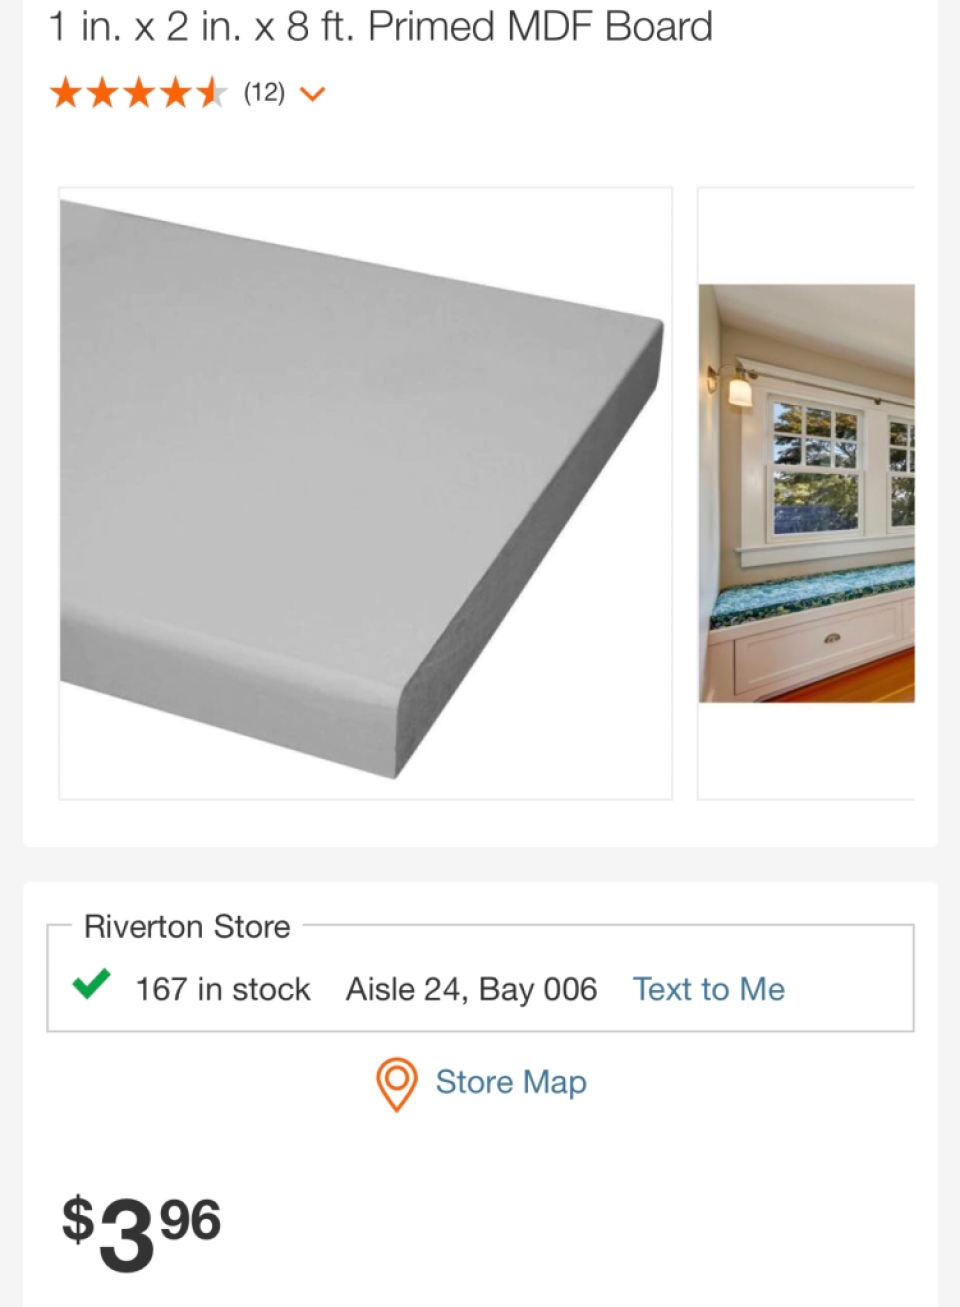
- Primed MDF boards (you can use any size that would look best for the accent wall style you want, for this project I used 1×2’s.)
- Brad Nailer with 2” nails
- A saw (I used a circular saw & table saw)
- Wood Filler
- Sanding Block
- Paintable Caulk
Paint Supplies:
- Wooster Pro Shed Resistant rollers (I used 6” & 4” rollers for this project)
- Wooster short handle 2” brush
- Carpet Shield or something to protect your carpet
- Tape (Frog Tape is preferred)
- Eggshell or Matte Paint for walls. Satin for baseboards or trims. And flat for ceilings. (For this project I used Dark Secret by Behr)
Optional Supplies:
- Nail Punch
- Foam rollers if you want a smoother finish on your accent boards
✅Let’s get to building that Accent ceiling bedroom!
- Figure out the design you want. For mine I knew that I wanted to expand it onto the ceiling so I drew out a couple of plans on paper before deciding. Once I decided on the design, I measured my wall so that I could figure out how much wood I would need.
2. Measure & Cut wood to size. I used my circular saw and it worked out great.
3. Nail those babies into the wall! I used my Brad nailer and used 2” nails. Since some of the boards were not going into studs, I would angle my nailer at different angles every time I added a nail to the board. This tactic would lock the wood into place in my drywall. (You can view this video HERE on my TikTok that explains how to do that).
4. (Optional but highly recommended) Use a nail push (nail set?) to hammer in any nails that may be sticking out of the wood. This can happen if you’ve angled your nail gun too much, it may not set in all the way.
Once you’ve set in those nails, take some wood filler and fill in the holes created by the nails. Once dried, sand the excess wood filler off.

5. Caulk!! It looks way more clean cut, so never skip this. (Especially if you paint with a dark color). Also make sure you use Paintable Caulk, not silicone.
6. Paint!!!! Earlier I attached my paint supplies to the list above. Be sure to cut in first, then roll. Likewise, I have some awesome paint tip videos on my Instagram reels or TikTok account. Be sure to check them out. 😉
VOILA!! You’ve done it!! 🙌🏻🎉
If this is your first accent wall or accent ceiling then be sure to tag me at @ourfamilymaison on Instagram so that I can give you a shoutout. Congrats on your project!!!
Please give me a follow if this post helped you in any way, I’d love your support and thank you so much for visiting my blog.
Watch this YouTube video below on steps in creating an accent wall:


One Comment
Pingback: